Cancelling LinkedIn Premium is a journey of self-discovery, mild annoyance, and clicking too many times.
Maybe you’ve realized that the “InMail” feature isn’t quite the game-changer you thought it would be, and you’re tired of crafting personalized messages that never seem to get a response. Or perhaps you’ve come to the conclusion that the “Who’s Viewed Your Profile” feature is just a one-way ticket to paranoia and self-doubt. Whatever your reasons may be, just know that you’re not alone in this decision.
But wait, what if you’re having second thoughts? What if you’re worried that canceling your Premium subscription will somehow diminish your professional worth or make you less attractive to potential employers? Well, here is the thing: your value as a professional goes far beyond a little gold badge next to your name.
For desktop users
Sign in to LinkedIn: Go to the LinkedIn website, and sign in with your email and password. Make sure you use the account that has the Premium subscription.
Go to your profile: Click on the “Me” icon at the top of the LinkedIn homepage. This icon shows your profile picture. A dropdown menu will appear.
Find your premium settings: In the dropdown menu, click on “Access My Premium.” This brings you to a page that shows what type of Premium plan you have and what you get with it.
Look at subscription details: On this page, find the section called “Manage Premium account” on the right side and click on it. This takes you to a page where you can see more about your subscription.
Find the cancellation option: Look for a link or button that says “Cancel subscription” or “Cancel auto-renew.” This option might be at the bottom of the page. Click it to start the cancellation process.
Tell them why you’re cancelling: LinkedIn might ask you why you’re cancelling. You can answer this if you want, or skip it. Then, you’ll need to confirm that you really want to cancel.
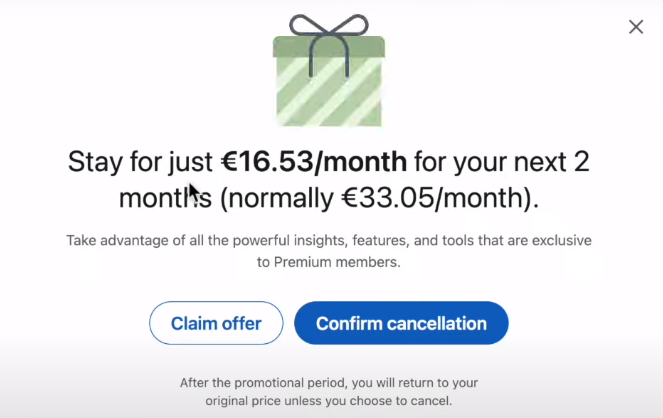
Final confirmation: LinkedIn will probably try to lure you back with a discounted rate or some other enticing offer. Don’t fall for it. If you still wish to proceed, confirm your cancellation. After you confirm, you should see a page that tells you your subscription will not renew. LinkedIn will also send you an email to confirm this. Make sure to keep this email for your records.
Double-check Everything: Go back to your Premium settings to make sure your subscription is really set to end. You can keep using Premium features until the end of the current billing period.
For mobile app users
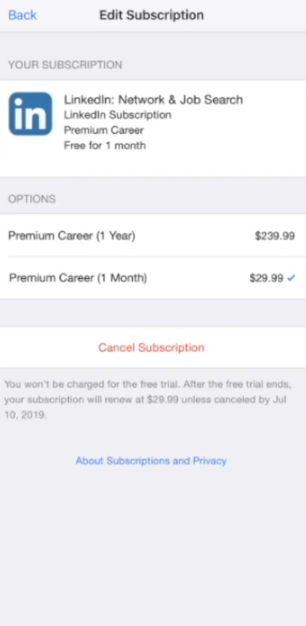
The LinkedIn mobile app may not always offer the option to directly cancel the Premium subscription. It’s generally recommended to perform this cancellation through the desktop site. However, if you subscribed via your iOS or Android device, you will need to cancel through those respective services (App Store or Google Play Store).
Apple app store
Open Settings on your iOS device.
Tap your name, then tap “Subscriptions.”
Find and select your LinkedIn Premium subscription.
Tap “Cancel Subscription” and confirm your decision.
Google play store
Open the Google Play Store on your Android device.
Tap Menu (three horizontal lines), then tap “Subscriptions”.
Find and select your LinkedIn Premium subscription.
Tap “Cancel Subscription” and follow the instructions to confirm.
Additional tips
- Always cancel at least several days before your next billing date to avoid being charged for another cycle.
- Keep an eye on your email and bank statements following cancellation to ensure no further charges are processed.






Published: Jun 4, 2024 04:55 pm